Golden Hour vs. Blue Hour: Which is Better for Photography?
Natural light plays a very important role in photography. It changes our mood, tone, flight, and impact of the image. There are only two special things through which you can capture a very strong magical movement picture, which are golden and blue, and under which you can change your photography through a very unique atmosphere. Let’s know which of these is better and learn about them.
What is the Golden Hour?
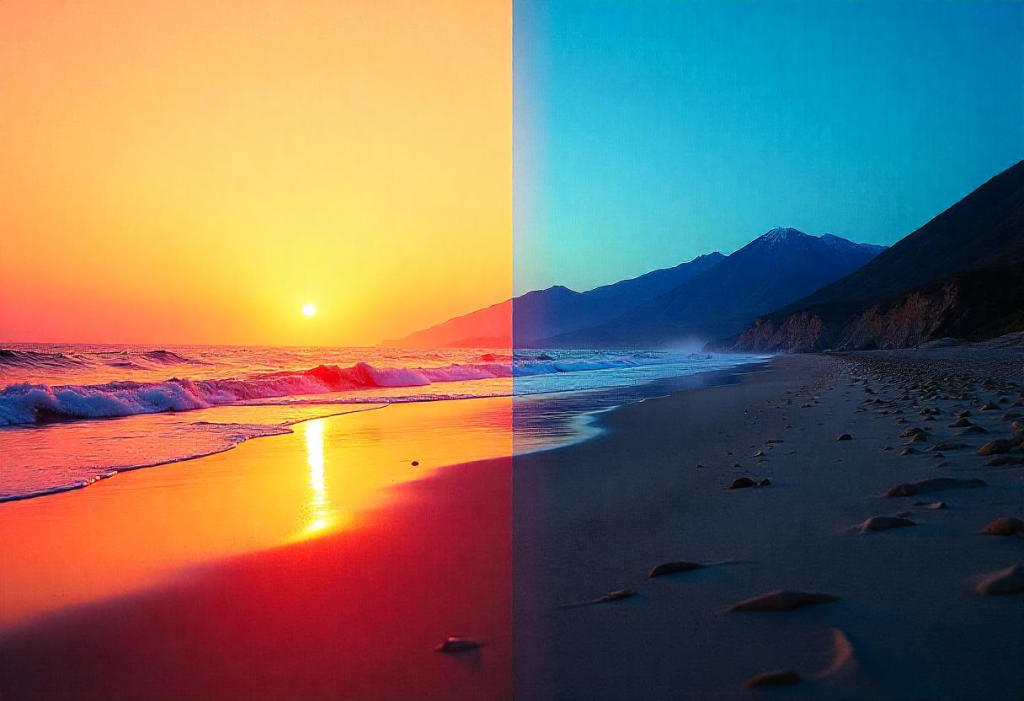
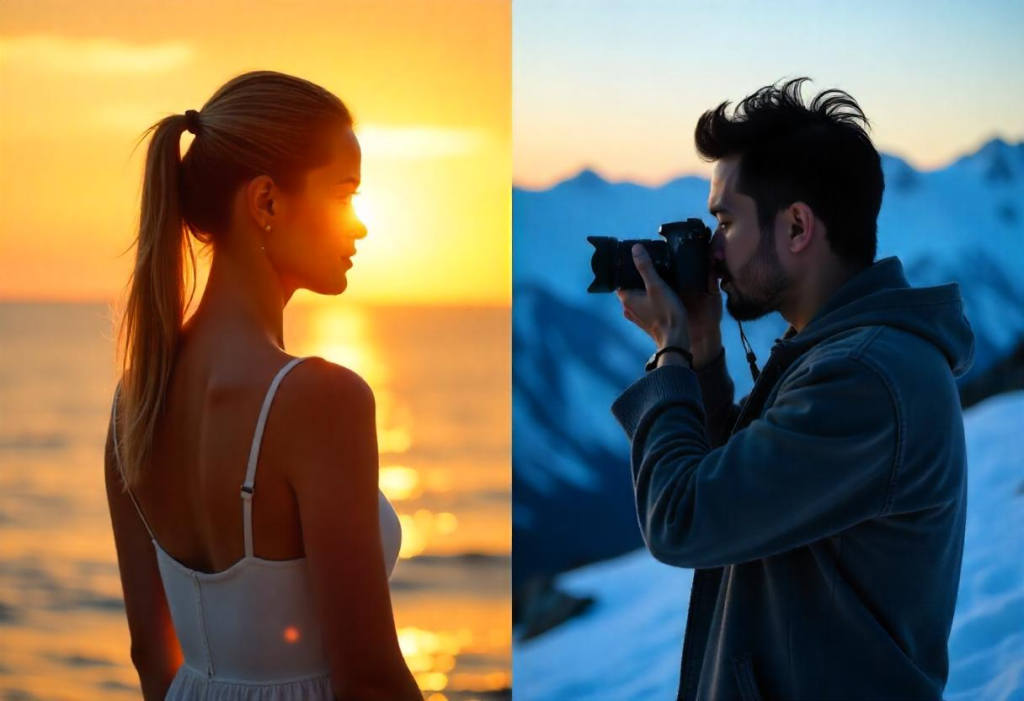
Golden Hour occurs when the sun is about to rise or a little before dusk, when the sunlight is low on the horizon. In this period when the light comes, when it is warm, soft or diffused, in which there are many shades of orange, red, and yellow color, it is Golden Hour.
In simple words, 30 minutes after sunrise
30 minutes before sunset.
Why is Golden Hour used for photography?
Firstly, it is created with softening and soft shadows, which creates a very good effect that brings out the skin tone in a very powerful way in portrait photography.
If no contrast of vibrate colours is seen, then a very good texture comes out with very low contrast which looks very good in landscape photos.
Warm tones are ideal for portrait, landscape, and street photography, which are useful in creating nostalgia, and this helps a lot of photographers.
What is Blue Hour?
Blue Hour comes before sunrise or some time after sunset where you get to see cold and very strong winds. In this period, you can get a lot of good body material canvas and good dramatic shots.
Read Also: Street Photography 101: Gear, Settings & Legal Tips You Need to Know
In simple words, blue is when it happens 30 minutes before sunrise, and about 30 minutes after sunset.
Why should blue color be used for photography?
Blue color should be chosen for photography because it provides a very cool and bright color. Rich blue color brings a great effect, which is very good for storytelling
For city and urban shots, a lot of artificial light is necessary which gives a school and tremendous cinematic appeal.
Long exposure is very good for night photography, which gives very good effects
There are many opportunities for astrophotography but it helps capture night photography and such city lights.
Comparison Table of Monthly Income, Type of Photography, Average Earnings Per Project.
| Type of Photography | Target Audience/Platform | Average Earnings Per Project | Monthly Income (₹) | Top Influencers/Brands Collaborating |
| Golden Hour Portraits | Instagram, Pinterest, Facebook | ₹5,000 – ₹15,000 per session | ₹50,000 – ₹1,50,000 | Fashion, Lifestyle, Travel Influencers |
| Golden Hour Lifestyle Shots | Instagram, YouTube | ₹8,000 – ₹20,000 per session | ₹60,000 – ₹2,00,000 | Travel Vloggers, Beauty Influencers |
| Golden Hour Product Shoots | Instagram Reels, E-commerce | ₹10,000 – ₹25,000 per shoot | ₹75,000 – ₹2,50,000 | Skincare, Fashion, and Tech Brands |
| Blue Hour Cityscapes | Instagram, 500px, Unsplash | ₹6,000 – ₹12,000 per session | ₹50,000 – ₹1,00,000 | Urban Lifestyle, Travel Influencers |
| Blue Hour Silhouettes | Instagram, Visual Art Blogs | ₹4,000 – ₹10,000 per session | ₹40,000 – ₹90,000 | Photography Enthusiasts, Art Creators |
| Golden Hour Drone Shots | YouTube, Instagram Reels | ₹12,000 – ₹30,000 per shoot | ₹1,00,000 – ₹3,00,000 | Travel, Adventure, and Nature Channels |
| Blue Hour Street Photography | Instagram, Photo Blogs | ₹5,000 – ₹12,000 per session | ₹45,000 – ₹1,20,000 | Street Photographers, Urban Creators |
Read Also: Nature & Wildlife Photography: How to Get the Perfect Shot
Photography Career Opportunities: Niche-wise Salary and Top Clients
| Photography Niche | Average Salary (Per Annum) | Top Companies/Clients |
| Landscape & Nature Photographer | ₹4,00,000 – ₹6,00,000 | National Geographic, Lonely Planet, Discovery Channel |
| Fashion & Portrait Photographer | ₹5,00,000 – ₹8,00,000 | Vogue, Elle, Harper’s Bazaar, Modelling Agencies |
| Travel & Adventure Photographer | ₹3,50,000 – ₹5,00,000 | Conde Nast Traveller, Travel Magazines, Influencers |
| Architectural & Real Estate Photographer | ₹4,00,000 – ₹7,00,000 | Knight Frank, CBRE, Luxury Hotels, Airbnb |
| Event & Wedding Photographer | ₹5,00,000 – ₹10,00,000 | Luxury Wedding Planners, Destination Wedding Agencies |
| Stock Photographer | ₹3,00,000 – ₹6,00,000 | Getty Images, Shutterstock, Adobe Stock |
Visual Comparison Table: Golden Hour vs Blue Hour
| Feature | Golden Hour | Blue Hour |
| Time of Day | After sunrise / before sunset | Before sunrise / after sunset |
| Light Quality | Warm, soft, golden tones | Cool, soft, bluish tones |
| Ideal For | Portraits, landscapes, nature shots | Cityscapes, night photography, moods |
| Mood | Romantic, dreamy, nostalgic | Calm, mysterious, cinematic |
Read Also: The Importance of Lighting in Photography: How to Capture Stunning Photos
Quick Tips for Shooting During Golden & Blue Hour
Use wide apertures (f/1.8 – f/2.8) for dreamy bokeh, Wide apertures allow more light into your lens, which is ideal for low-light conditions like golden or blue hour. They also produce a beautifully blurred background, making subjects stand out.
Be on location before the hour begins
Golden and blue hour light changes fast. Arriving 15–30 minutes early gives you time to set up, find your composition, and prepare for the perfect lighting conditions.
Use apps like PhotoPills or GoldenHour.
One to track the timing Light varies with the season and your location. These apps help you pinpoint exactly when golden or blue hour starts and ends.
Bring a reflector for Golden Hour; use a tripod for Blue Hour
During golden hour, a reflector helps enhance soft sunlight on the subject. During blue hour, low light makes a tripod necessary for stable, long-exposure shots.
Keep shutter speed low during Blue Hour for clarity
Slower shutter speeds are essential to gather more light in blue hour conditions. Use a tripod to avoid motion blur while capturing sharp, well-exposed images.
Essential Tools & Apps for Perfect Timing (Expanded)
PhotoPills An essential planning tool for photographers. It provides accurate golden and blue hour timing, sunrise/sunset info, moon phases, and more—perfect for shot planning.
Read Also: Top 10 Types of Photography You Should Know in 2025
Lightroom Mobile
A powerful mobile editing app. Adjust temperature, shadows, contrast, and tones to enhance your golden hour glow or blue hour mood. Supports RAW editing.
Sky Guide or Stellarium
Ideal for planning blue hour sky photography. These apps show real-time positions of stars, constellations, and the moon—great for astrophotographers.
Common Mistakes to Avoid (Expanded)
- Arriving late and missing peak light: The lighting window is short. Being late can mean missing the soft, flattering light that defines golden and blue hour photography.
- Not adjusting white balance to match the hour: Golden hour produces warm tones, while blue hour is naturally cooler. Manually adjust white balance or shoot in RAW to preserve natural lighting tones.
- Forgetting stabilizers for low light (tripod essential for Blue Hour): Long exposure shots without a tripod often lead to blur. Carry a tripod or a stable surface option for crisp images in low-light settings.
- Shooting in JPEG only — always shoot in RAW for better edits: RAW format gives you full control in post-processing, especially for balancing exposure and color. JPEG compresses the image, which limits editing flexibility.
Top Mistakes to Avoid During Blue Hour Photography
Read Also: Portrait vs. Candid: What’s Your Photography Style?
Blue hour, occurring just after sunset or before sunrise, provides a cool, moody tone perfect for landscapes or cityscapes but it’s also easy to get wrong.
- Not using a tripod Long exposures demand stability.
- Shooting in JPEG Limits editing flexibility.
- Incorrect white balance Results in unnatural color casts.
- Underexposing the foreground Lose detail in shadows.
- Not planning ahead Blue hour lasts only about 20–30 minutes.
- Prepare your gear and composition in advance to make the most of this fleeting light.
- Post-Processing Tips for Enhancing Natural Light Photos.
- To elevate your golden or blue hour shots, post-processing is key.
- Adjust white balance to preserve the natural warmth or cool tones.
- Lift shadows and reduce highlights to balance exposure.
- Use split toning or color grading to emphasize mood.
- Add subtle clarity and contrast to draw out detail without over-sharpening.
- Always shoot in RAW to retain maximum editing flexibility.
- Apps like Lightroom and Snapseed can be used even on mobile to enhance the image while keeping the natural feel intact.
Conclusion
This blog is all about new photography techniques, and in this blog, you also got to know about golden hour and blue hour, finally, the scope of photography, etc. Also, you must have also learn about mistakes to Avoid During Blue Hour Photography, Quick Tips for Shooting During Golden & Blue Hour. Also, apart from this, If you think photography is your career, then you can explore various Photography Diplomas and degree programs at AAFT as well.


